Posts

Showing posts from October, 2018

Support Local web Servers to go Live and HTTPS

Image
Ngrok- Helps Exposing Local web Servers to Public To make our local development go live or HTTPS, we need to install NGROK. NGROK helps exposing our local development to internet. Download NGROK by going to the link:  Click Here . Once downloaded install the NGROK. Go to cmd C:\folder_location\ngrok-stable-windows-amd64 and execute below command:                   ngrok http -host-header=rewrite 123.132.156.219:80   //(Change the IP as of your system and Port 80 to Your Server Port. By default 80 is the Server port) On execution of the above command, Localhost goes live and points to URLS mentioned in the image below. The publically accessible URL will be live for 7 hours only.  In order to make it live after 7 hours, need to rerun the above command.   There are other alternate ways to do so. One of them is Serveo .  Serveo is an SSH server just for remote port forwarding....
Chat Bots are giant step in transforming CMS to next generation of Digital experiences and engagement - Part 2

Image
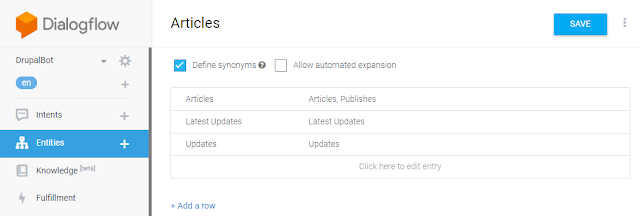
Let's Continue where we left off in our previous post . We will start configuring DialogFlow for processing our Intents, Entities and webhook. 3. Configuring and Working with DialogFlow Steps to Create a New Dialogflow Agent: A Gmail account to access Dialogflow To Create app at go to  https://console.dialogflow.com/api-client/#/login Click on Sign in With Google and It will ask : "DialogFlow wants to access your Google Account" . Click Allow and Accept T&C Click CREATE AGENT in Left Most Panel of Dialogflow Give Some Agent Name, like, "ChatBot" and it will create an agent Create Entities by Clicking Entity:                  1. Click on Entities in Left Most Panel and Create New entity: "Articles" . Check "Define Synonyms" and add synonyms for each entry:      Articles  Articles,Publishes                       ...